More help:
NWEA Support
Have an idea?
Share it!
Add Staff and Roles in Roster Import
You can add staff in bulk using the NWEA® roster spreadsheet template called Additional Users. You can also use it to assign
For example, you can assign the Proctor role to your teachers or other staff, including people already added into the
Check Before You Begin
- Ask your technical staff if email spam filters will allow automated emails from @auth.nwea.org. The automated email provides login information to your staff. See Firewall Allowlist and Email Configuration for more details.
- Choose the
- To get a list of your existing users and their current roles, access the
Complete Additional Users Template
Required role: Data Administrator
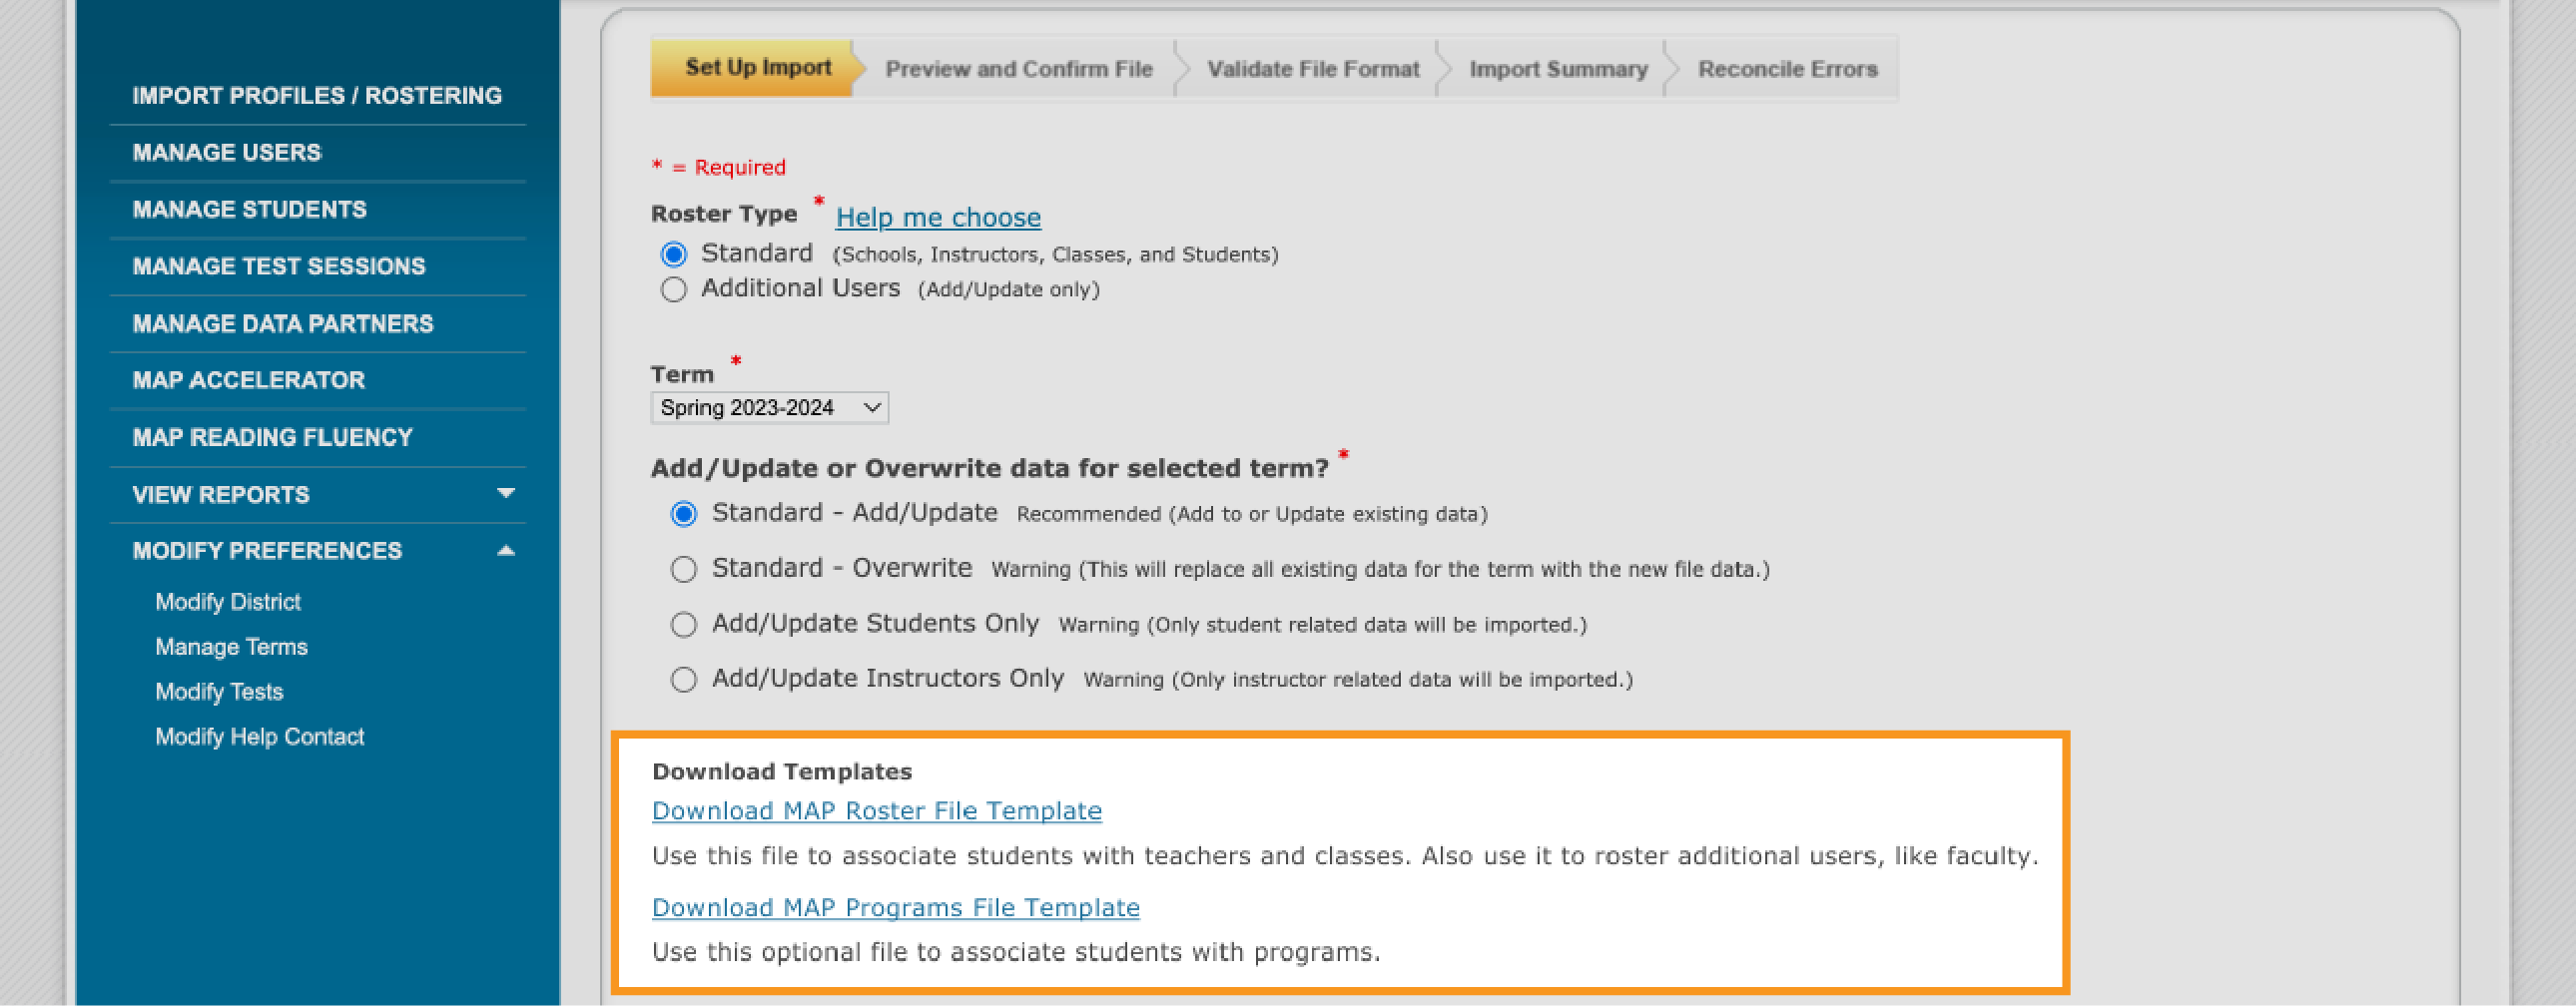
To download MAP Roster File Template:
-
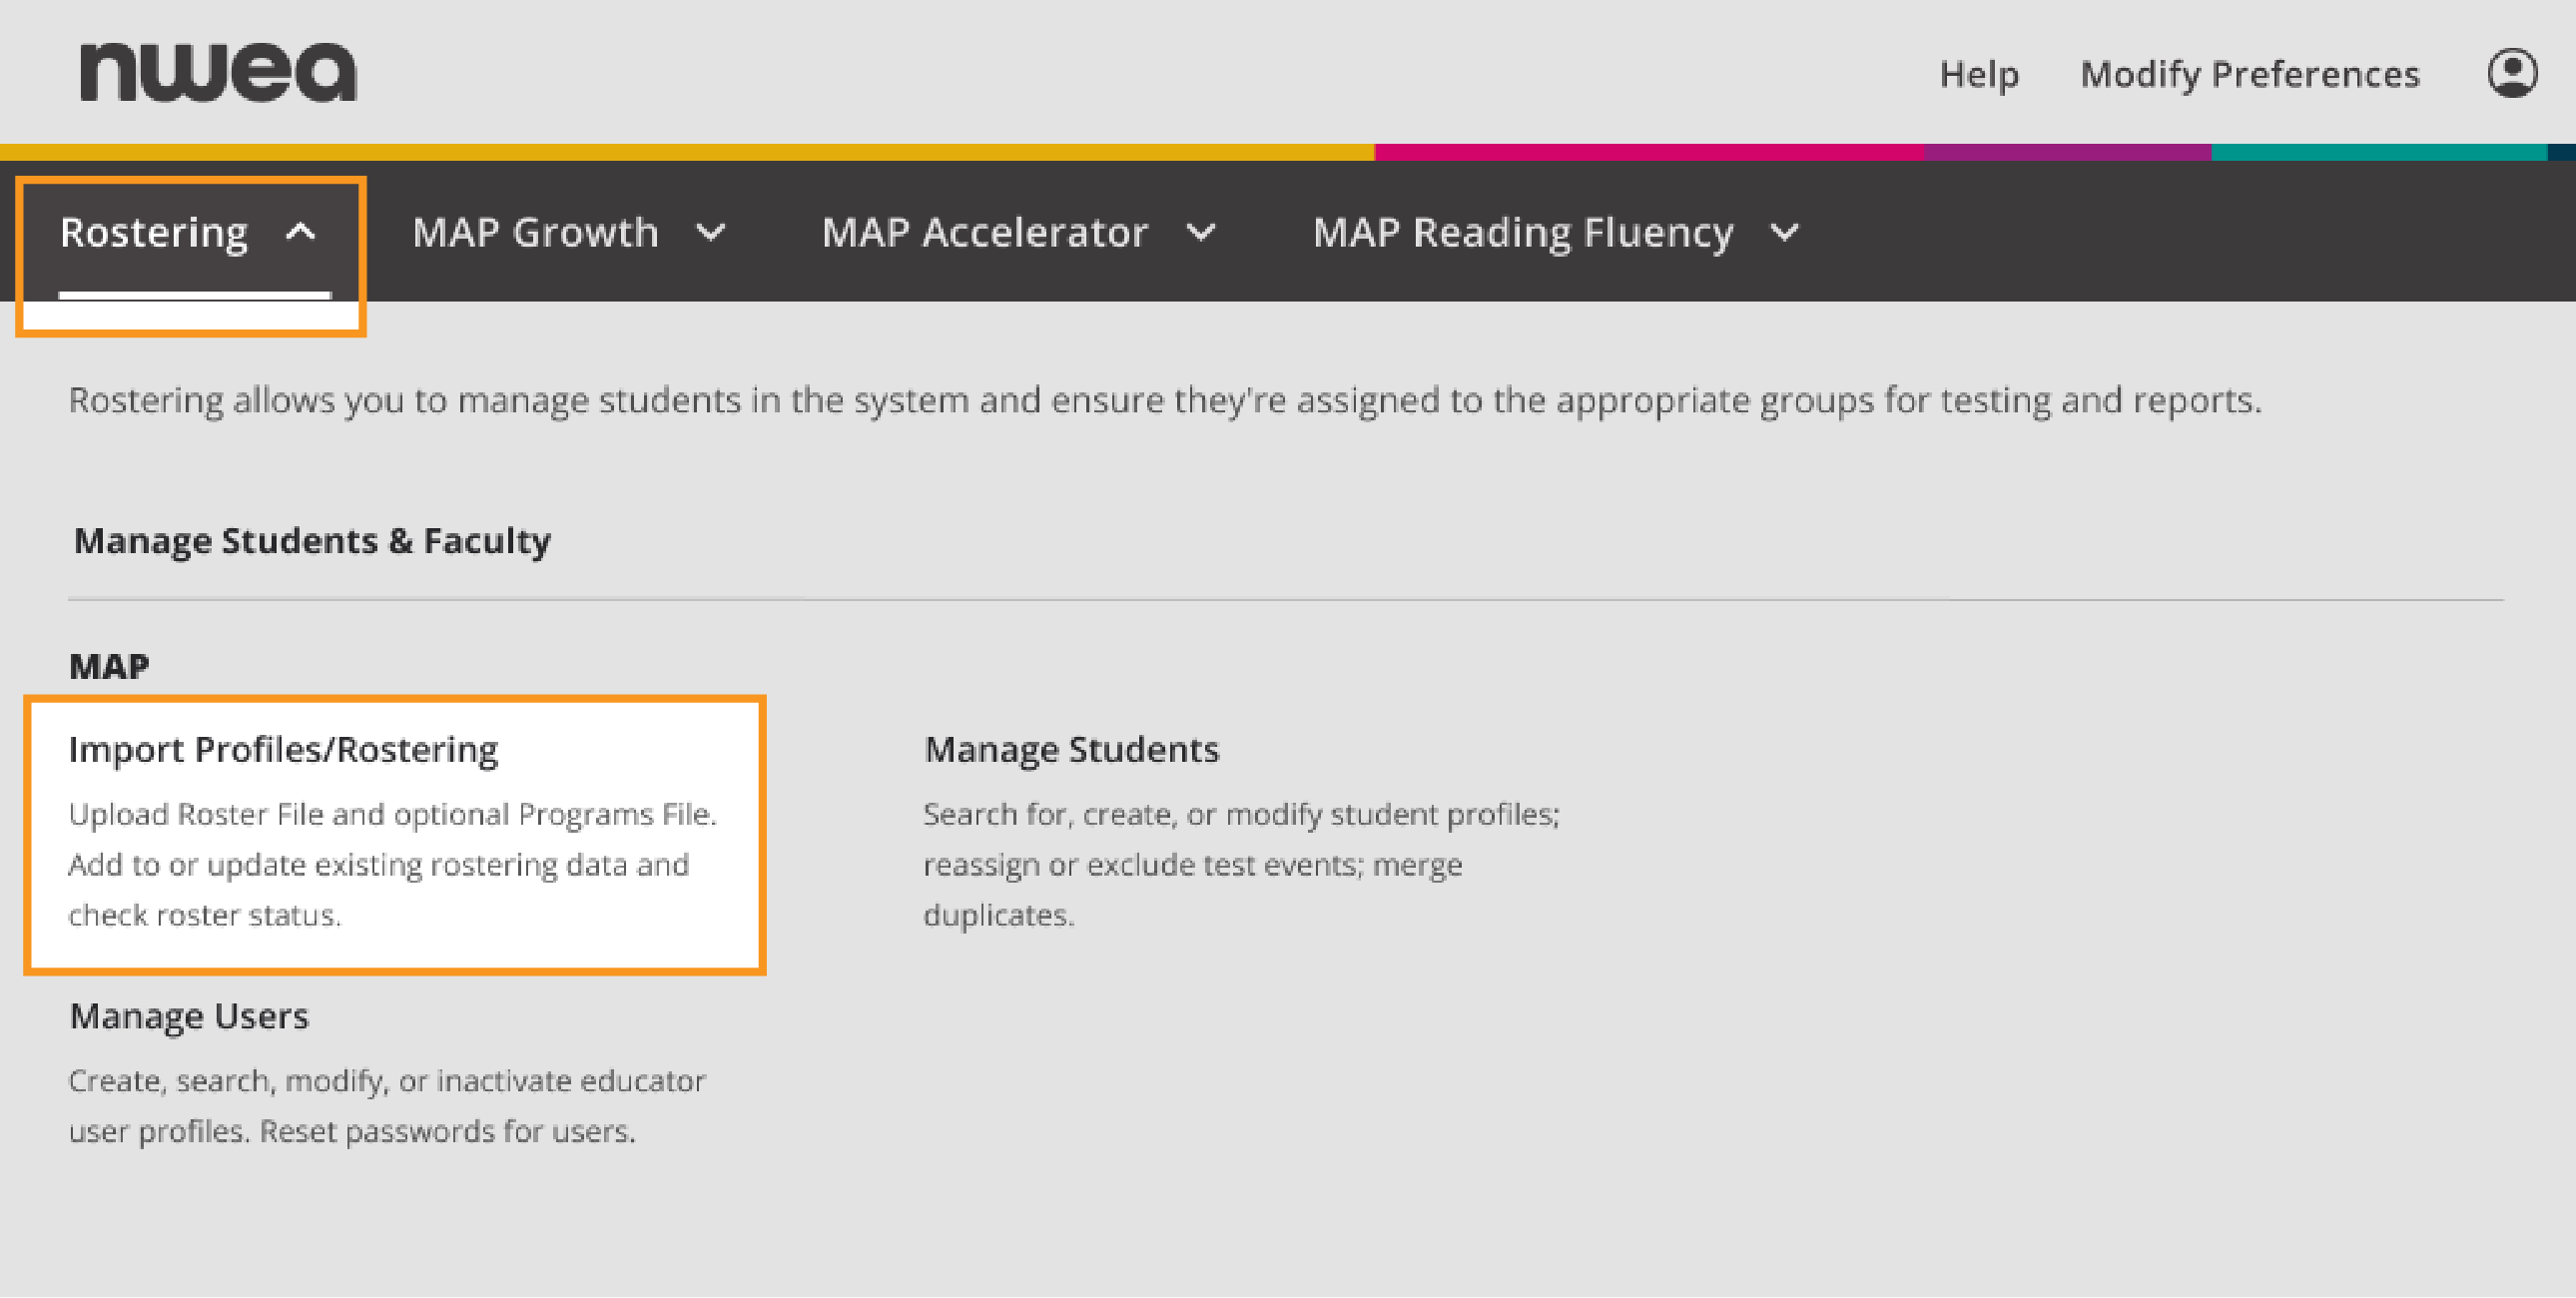
From the Rostering section of the start page main menu, select Import Profiles/Rostering.
-
Select Access NWEA Legacy Rostering to access the Set Up Import screen on the Import Profiles/Rostering page.
-
Under Download Templates, choose Download MAP Roster File Template (requires MAP role of Data Administrator or System Administrator).
-
Open the roster template and select the Additional Users tab.
-
Complete the required, blue-shaded columns at a minimum, and follow the descriptions provided in the top rows:

Note: If your organization uses Match on ID for your import process, the Instructor ID field is required in the Additional Users sheet. Match on ID is now the default matching method for new NWEA partners.
-
Beginning with column J, complete the roles you want to assign by typing “Y” in the appropriate column or columns.
Important: Also complete the School Name column when you assign roles to school staff, such as the School Proctor role. If you leave School Name blank, you will grant access to all schools. In the following example, the roles differ between schools:

-
Keep the first row in place, but remove the description rows, from row 2 through 8 (or whatever row is just above your information):

-
Save or export a copy of the spreadsheet using the comma-separated (CSV) file format.
Note: If you are using Excel®, avoid saving your CSV file(s) as a format variation like CSV UTF-8; however, if you are using a program other than Excel (such as Numbers® or Google Sheets™), you may need to save your CSV file(s) using a CSV format variation.
If operating outside the USA: Before saving, you might need to adjust settings so your CSV file uses commas to separate information instead of semicolons. See Alternative: Saving CSV outside United States.
Import Additional Users
Required role: Data Administrator
-
Log in at start.mapnwea.org.
-
Choose Rostering from the main menu. Then select Import Profiles/Rostering.
- Select Access NWEA Legacy Rostering to access the Set Up Import screen on the Import Profiles/Rostering page.
-
On the Set Up Import screen, choose Additional Users:

-
Under Roster File, click Add and browse to find the CSV file you saved.
- Click Next.
-
Continue through the import process:
1: Preview 2: Validation 3: Import summary 4: Post records The first 20 rows appear for you to check.
The Import Status message starts with “queued” and finishes with “validated.”
Note: “Please wait” continually blinks, even after validation is complete.
The final summary appears. Your data uploads. Actions
When you confirm that you chose the correct file, click Confirm.
If We Have Encountered an Error appears, see Preview Errors.
If File Format Validated with Errors appears, click Review Roster Errors. See File Format Errors.
– or –
If Data Validated with Errors (or No Errors) appears, click Review Import Summary. Continue to Import Summary.
If Reconcile Errors appears (near the bottom), then click it. See Reconcile Errors.
– After errors reconciled –
When Post Valid Records appears, click it.